I will be open up to and on Christmas Eve so if there is anything you think you may need pop along and have a look.
Both Love carvings, Amore, the Oak leaf and the Acorns and Oak leaf carving have now sold.
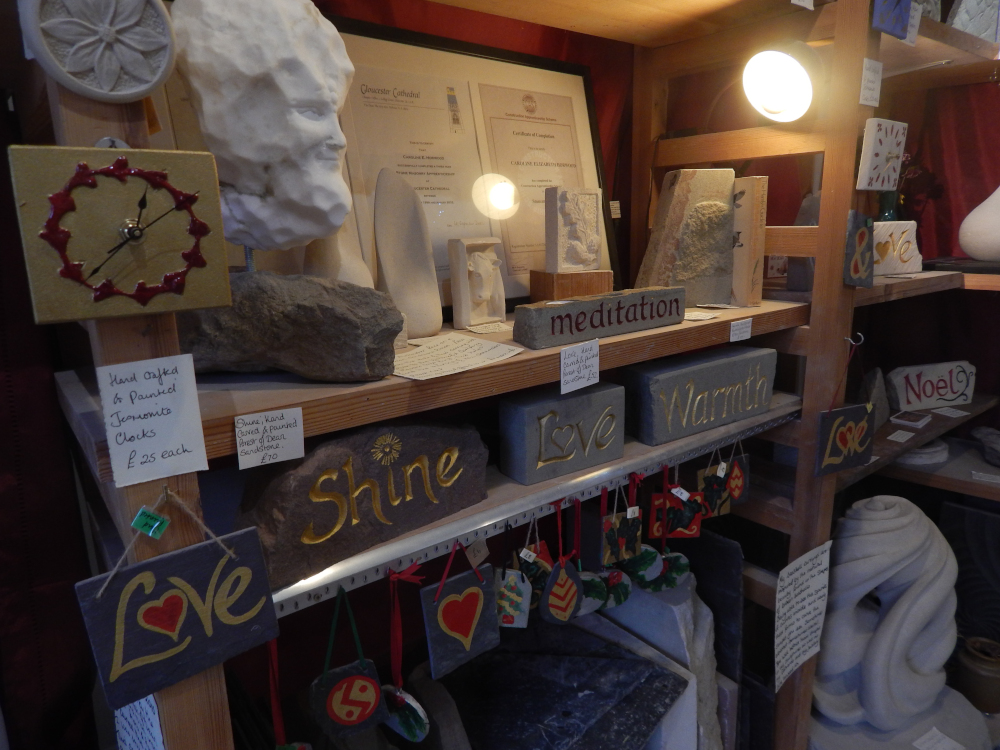
Here are some images of what I have in my shop right now. I have been cutting more stone for my popular hand carved letters and I am also making great progress with my commissions.
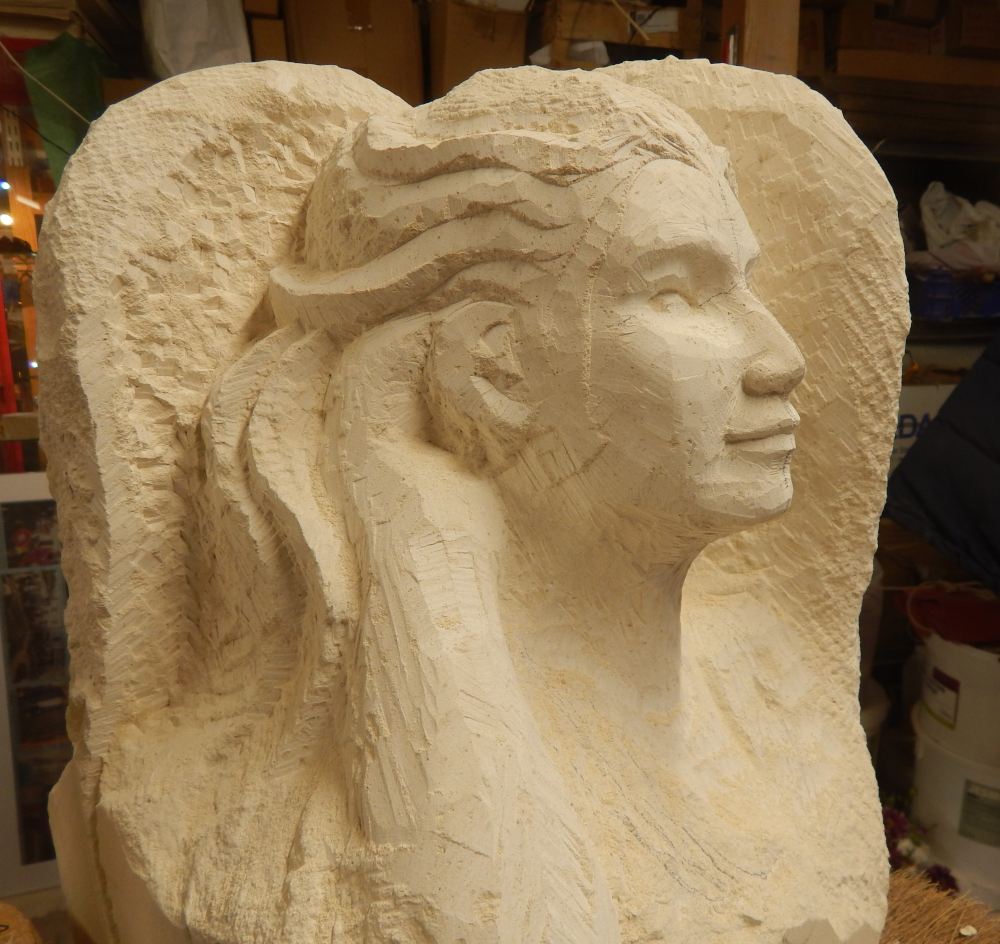
My angel carving has taken a bit of a back seat for a while as I have been putting together a proposal for a commission, there is lots of competition so I won’t know until 16th Jan if I am shortlisted. As soon as I know either way I will put all my work on here so you can see what I have been doing.
My Angel, listening.
My shop is a safe haven if you like it quiet, I only allow 2 at a time from the same bubble, my windows are open to allow air through and I have a beautiful velvet rope to allow you to browse and shop without feeling crowded. There is no rush I only ask that you wear a mask and sanitise your hands on entry.
Thank you for your continued custom and support throughout this extraordinary time in our lives.
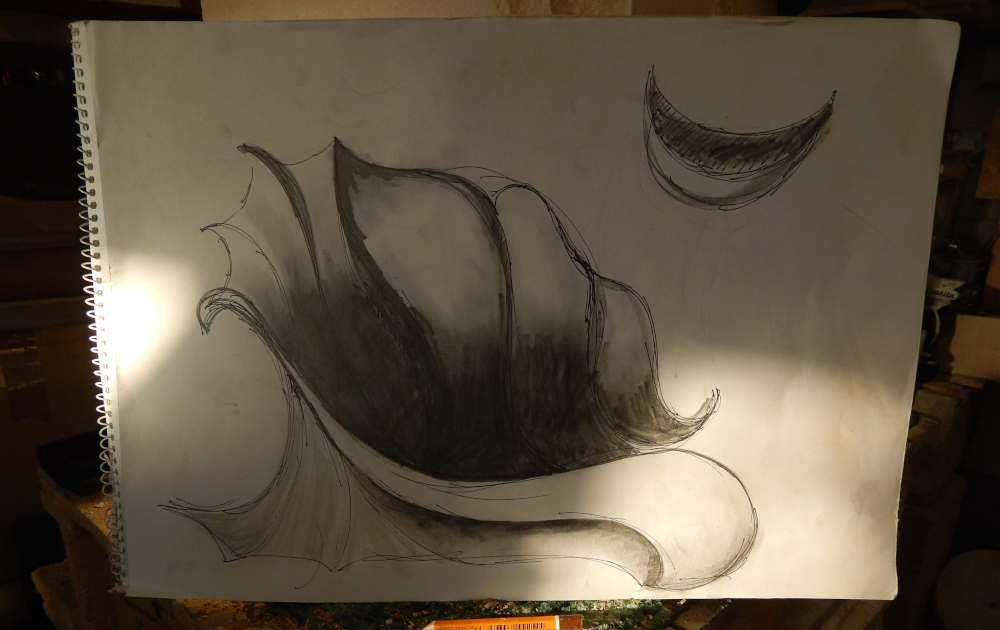
I have sketchbooks full of designs that I will carve one day but I only have one pair of hands so you can imagine my delight when a customer chose one of my designs for their commission.
My own design.
They wanted a swirly seashell wave form that could be built into a wall and have water run over it, I drew this 10 years ago and it is part of my ongoing fascination with fluid waves and seashell shapes.
Obviously the stone needs to be shaped before I can start to chisel out the inside to create the bowl shape, I used my hand saw and roughed off a chamfer, top right, from here I could start to see the shape developing.
I regularly referred back to my drawing and invited my customer in to have a look and see if there were any changes that they wanted to make before I proceeded. Obviously there is a point of no return. If you look at the drawing and the bottom left image you can see that the right side of the shape is higher and slightly mirrors the left side.
At this point I was able to use my core drill to help me achieve the depth and swirly shapes more efficiently.
While carving this I have to consider how the water flows around the sculpture and so I carved spirals and hollows to hold the water and help to direct it…I will only know the result of this once my customer tests it out, so maybe next year now. In order to create lightness but also interest I have carved through the spiral underneath. The stone resonated with a ring as I was chiselling it in the same way crystal or a bell would so I knew there were no faults in the stone.
Finally I needed to rinse the stone and wait for my customer to decide where the hole will be drilled. They loved it and I am looking forward to revisiting my design. Obviously it will be completely different but with the fluidity and movement that I love to carve.
I have been busy designing and carving lots of lovely new pieces available to buy off my shelves..
This is a piece of Birch hill sandstone that I have hand carved with tumbling acorns and oak leaves. It has a beautiful golden natural face down one side and the other 2 sides I ;have tooled with my bolster chisel. It costs £380 and measures 6 x 5 x 14 inches. It is suitable for inside or outside.
These two smaller carvings are; French limestone that I have carved and painted with Holly leaves and berries, it is £58 and measures 5 x 1.5 x 4 inches and Tetbury limestone on the right, hand carved with an Oak leaf and some Acorns, this measures; 4 x 1 x 4.75 inches and is £55.
The Green Man
I love designing and carving bookends, this pair is one of my more detailed and decorated. The Green man as a mythological creature represents nature and is a great source of inspiration for me. I have carved this pair with their eyes looking at each other. They are £450 for the pair and each one measures; 7 x 2 x 6 inches.
These two pairs of bookends have been carved in Forest of Dean sandstone from Birch hill quarry, the eyes pair are £70 and each one is 3 x 2 x 3 inches, the seashell inspired ones on the right are £125 and they measure 3.5 x 2 x 6 and 4 x 2 x 6 inches.
I have also been carving some more ornamental words, Calm is my particular favourite it is £125 and measures; 11 x 4 x5.5 inches. Noel is 5.25 x 2.5 x 1.75 inches and is £48. Meditation is £95 and measures 10.25 x 2.5 x 2 inches. Home is £60 and measures 4 x 6.75 x 3.75
I have hand carved them out of Forest of Dean sandstone from Birch hill quarry and painted them with colours that I think match the words.
I have drilled holes in some of them to make them into tealight holders.
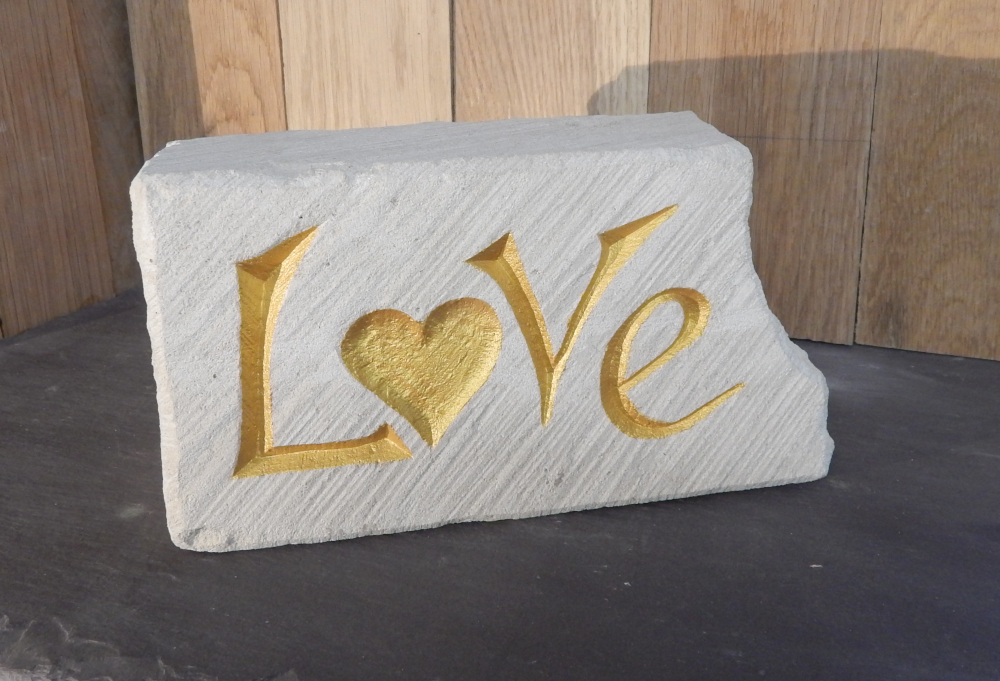
Love is hand carved Portland limestone and is wide enough to put a tealight hole in but this can be done on request, this is 7 x 3.5 x 4 inches and is £52.
Love hand carved forest of Dean sandstone is 6 x 2 x 3.5 inches and is £52, Us, hand carved and painted Forest of Dean sandstone is; 3.5 x 1.5 x 2.5 and is £25.
Finally I have been busy carving lots of lovely letters for you, I was asked to carve some of my really small ones again so i have a full alphabet of those and plenty to choose from for my larger letters and characters.
The larger ones (on the left) are from £15 each and they are carved out of local sandstone, Welsh slate and limestone from Tetbury, Portland and France. They are roughly 2 inches +tall, the smaller ones (on the right) are all £8 each and they are carved out of Forest of Dean sandstone, they are roughly 0.75 inches tall.
I have also been busy working on commissions and this carving was picked up last week by a very happy customer so I can now share the image with you.
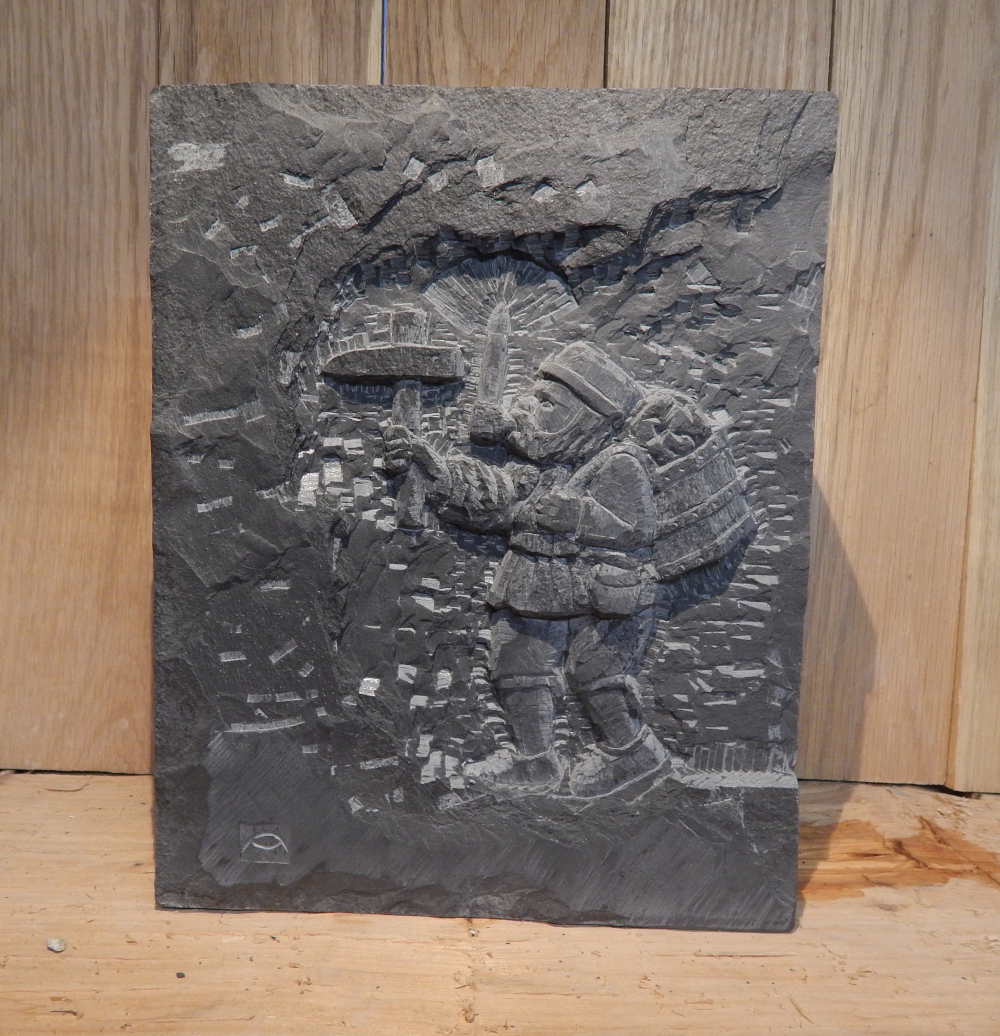
Freeminer.
This is a carving of a freeminer, you can see the brass of this in Newlands Church at the back of Coleford in the Forest of Dean. It is much more complicated as it has the crest with foliage and a helmet. This representation shows a Freeminer chopping at the rock face in a cave.
To become a Freeminer you must have been born within the Hundred of St Briavels, have worked in a mine for a year and a day and be over the age of 21. This gives you the rights to mine in the Forest of Dean and is still a tradition today.
I have carved him in Welsh slate as it is the perfect material to carve this type of fine detail and the rocky face.
If you would like to find out the cost please contact me.
I am looking forward to exhibiting some of my work at a charity exhibition in London next week. I will be driving my work up on Monday so I will be closed.
I have 3 of my sculptures on sale here and the commission normally taken by the gallery will be donated to the Worshipful company of masons to help train new stonemasons.
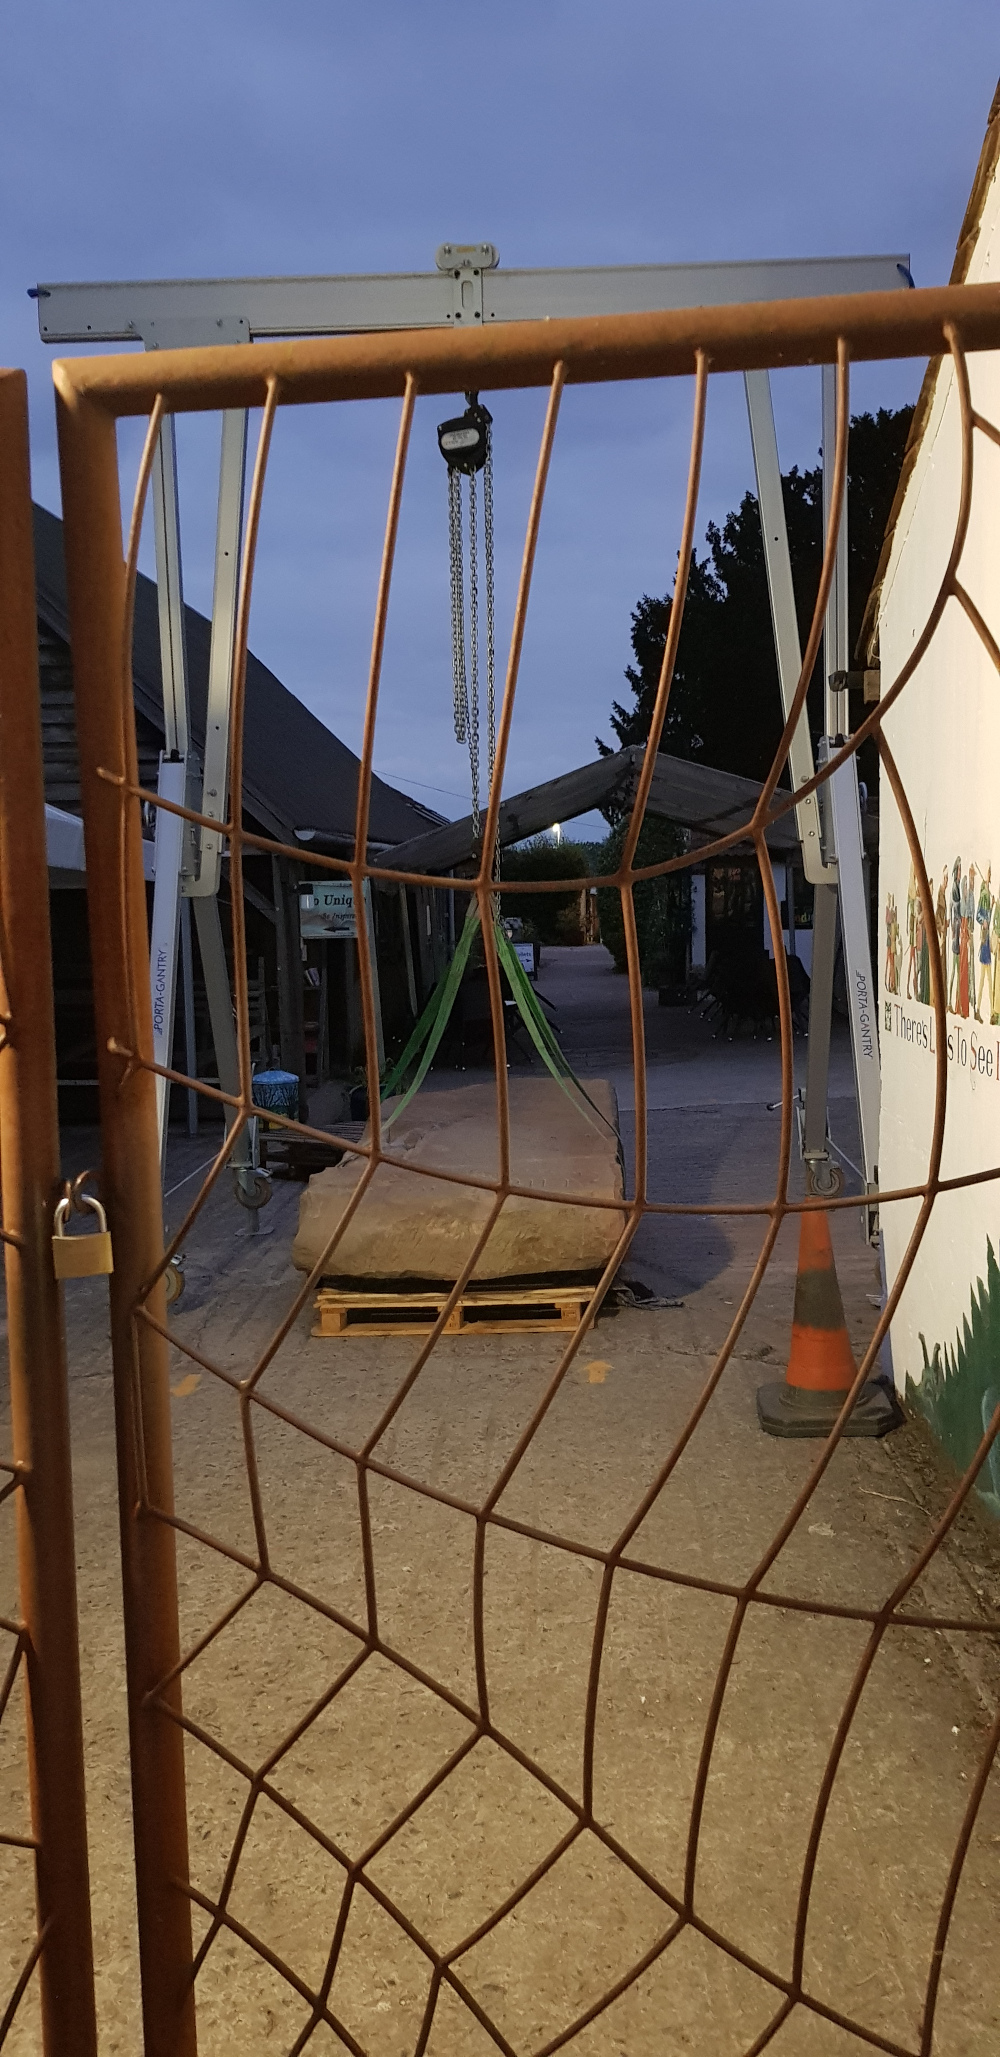
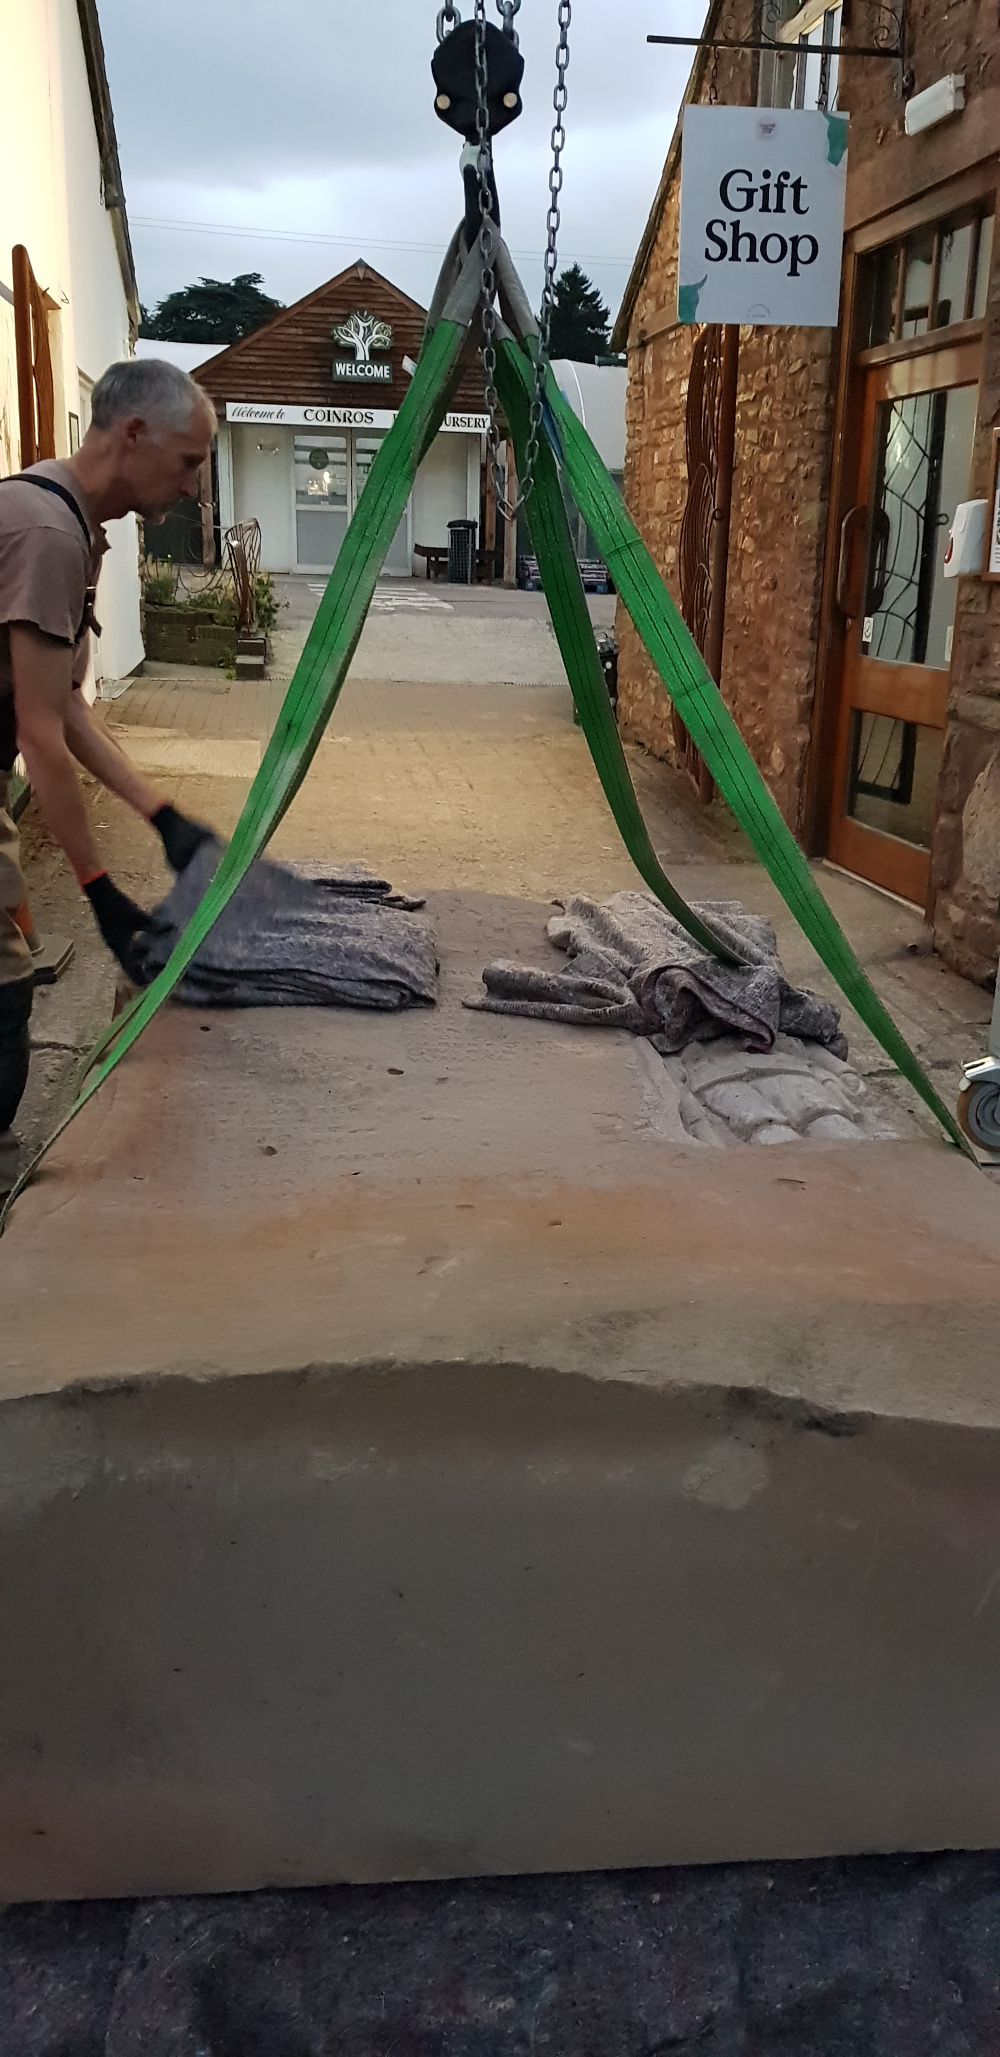
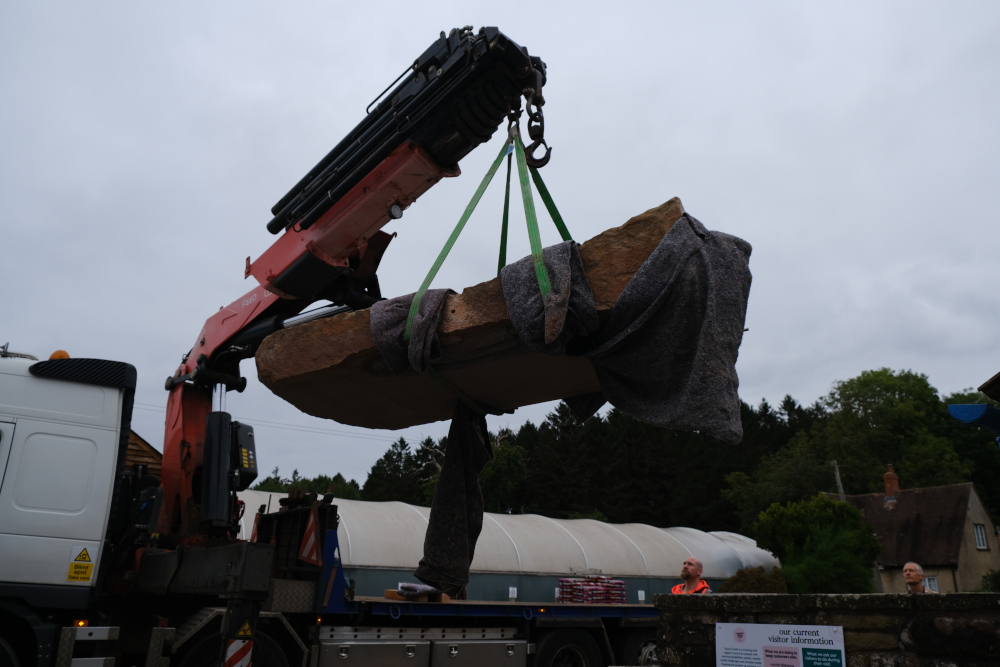
We used the gantry crane to lift the 3.8T block of Forest of Dean Sandstone and then carefully lowered it down onto blocks of wood to protect my precious carving. Once this was done we were then able to move the stone over by lifting and sliding over using the dolly on the beam. The stone would then be lowered back down and this was repeated other 3 times until it was where it needed to be.
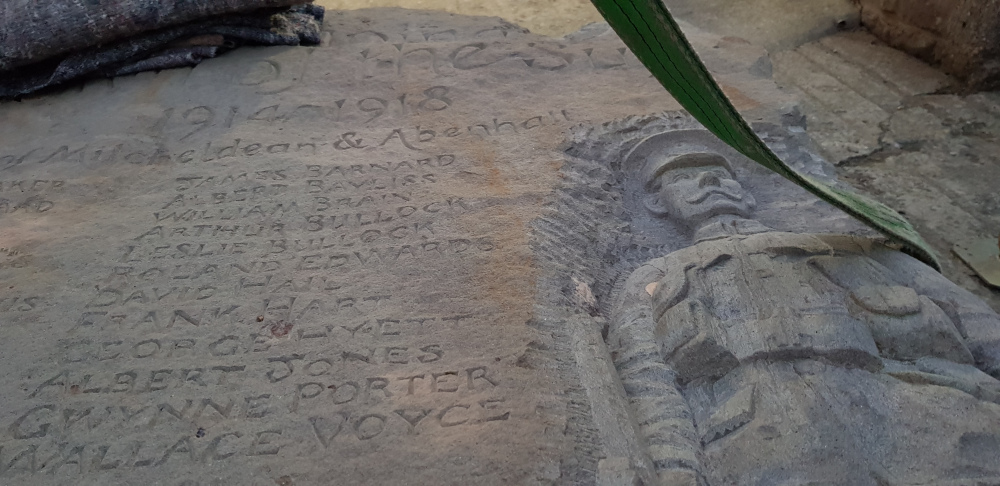
FloatingChecking the soldier.Just one more thing?
Obviously seeing the carving from this angle made me want to get my hammer and chisel and just do a little bit more carving.
It took a while.
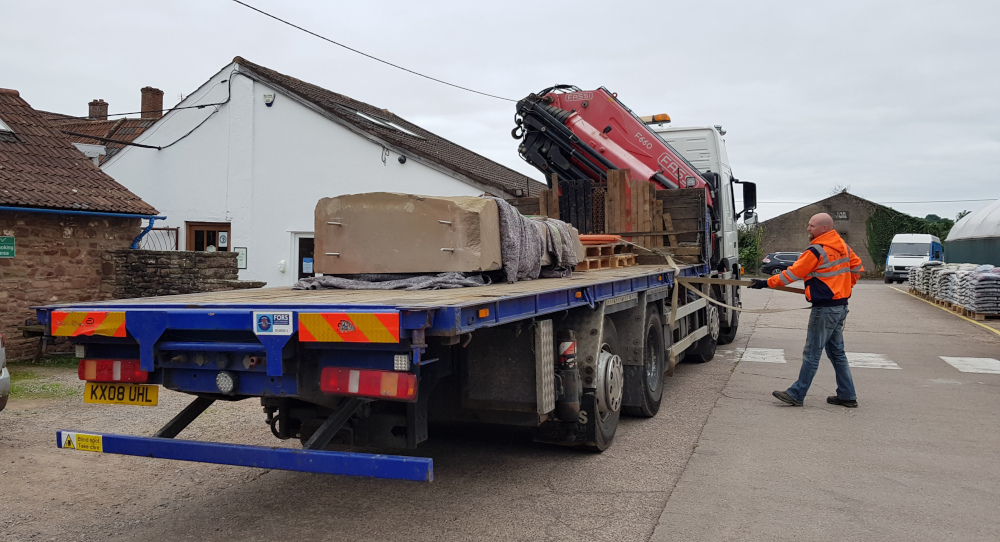
Once we had it lined up we could do no more until the lorry arrived the following morning and then the next stage of it’s journey could continue.
Protecting the stone
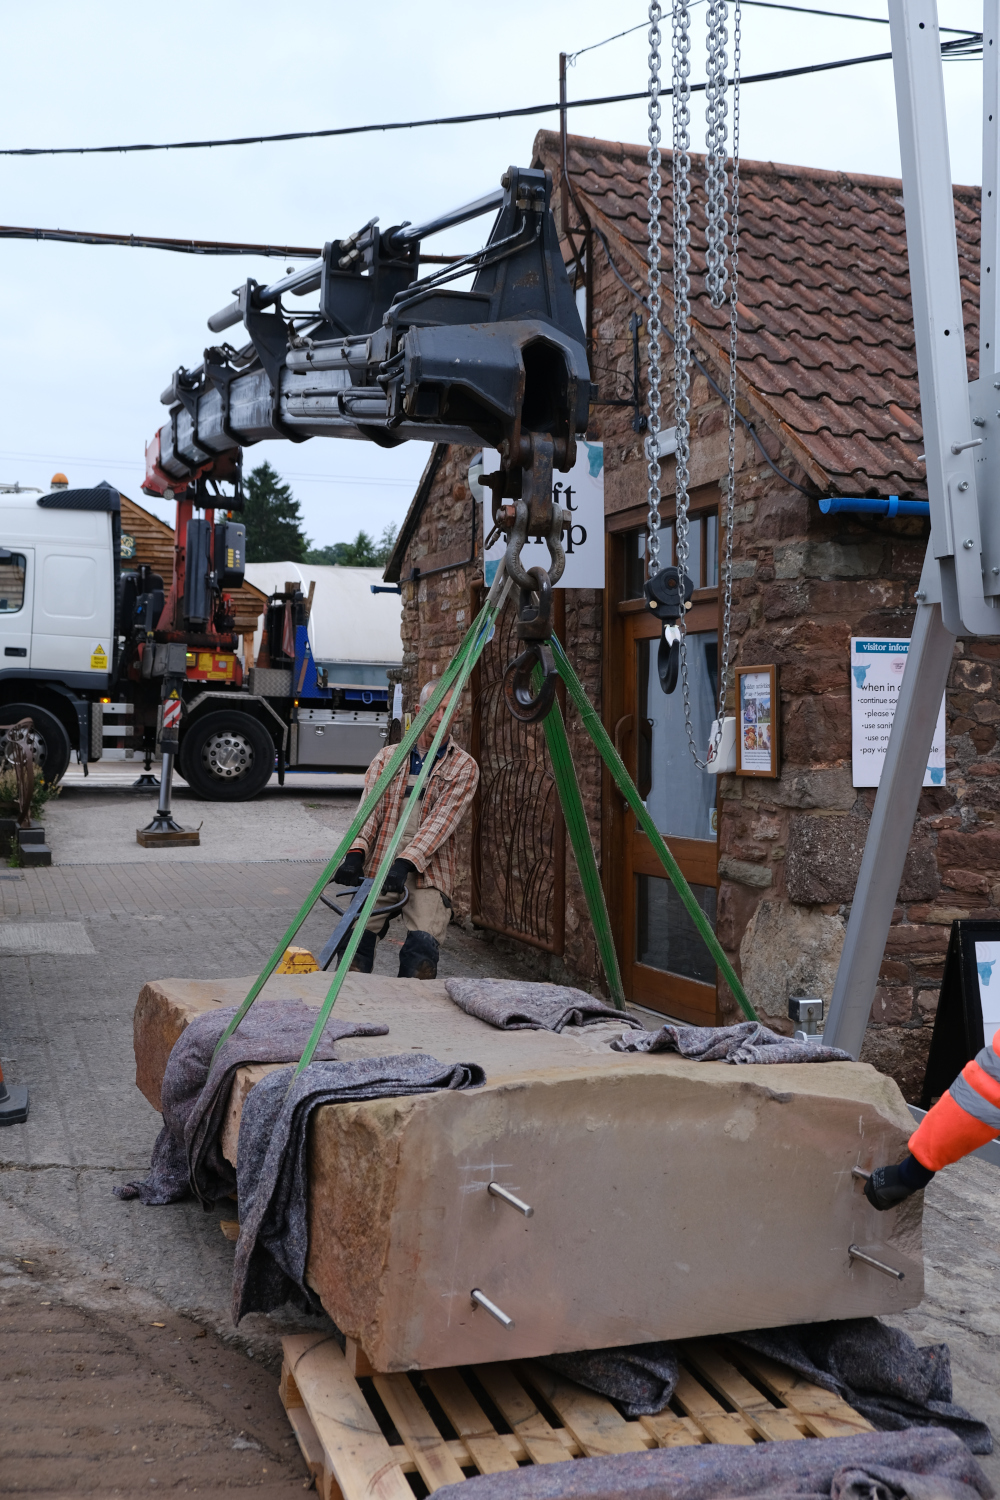
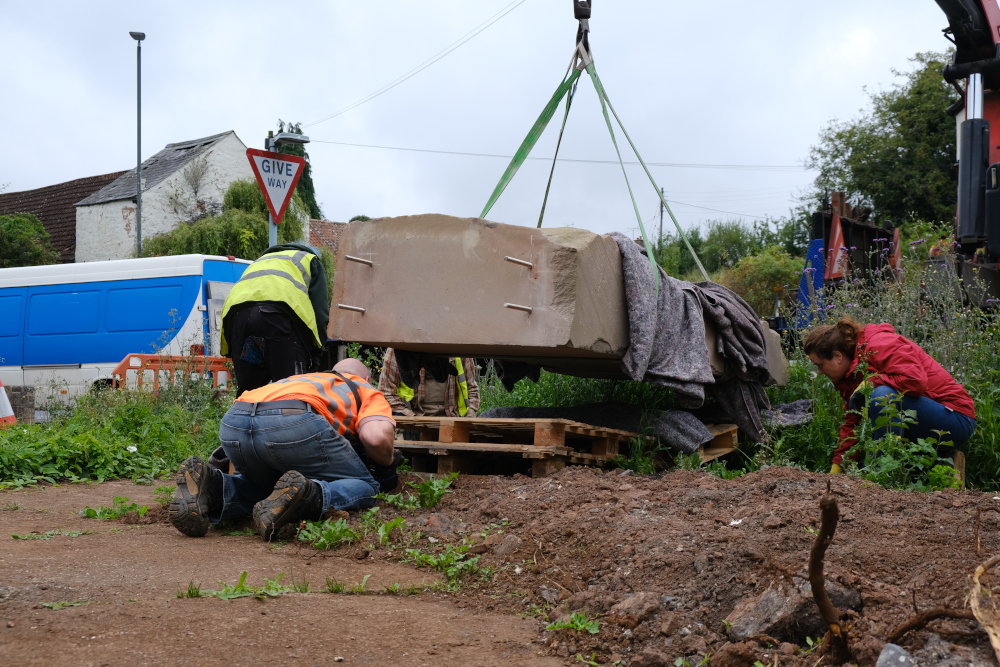
When the stone arrived at my studio it was just a block of stone, now it is something precious and needs to be protected, special blankets were wrapped around underneath the straps.
Once the stone was in place on the ground the holes could be drilled and the stainless steel bars could be fixed into position.
Stainless steel dowels cemented in.
The stone was end heavy, due to my carving we couldn’t balance the stone and so Damon used the pallet truck to assist with the moving until the lifting beam had cleared the overhead cables.
Using the pallet truck.Slowly.Lifting onto the lorry.
When the stone was outside my studio it looked huge, when it was lowered onto the lorry it looked so small but when it was lowered into place it looked like it had always been there.
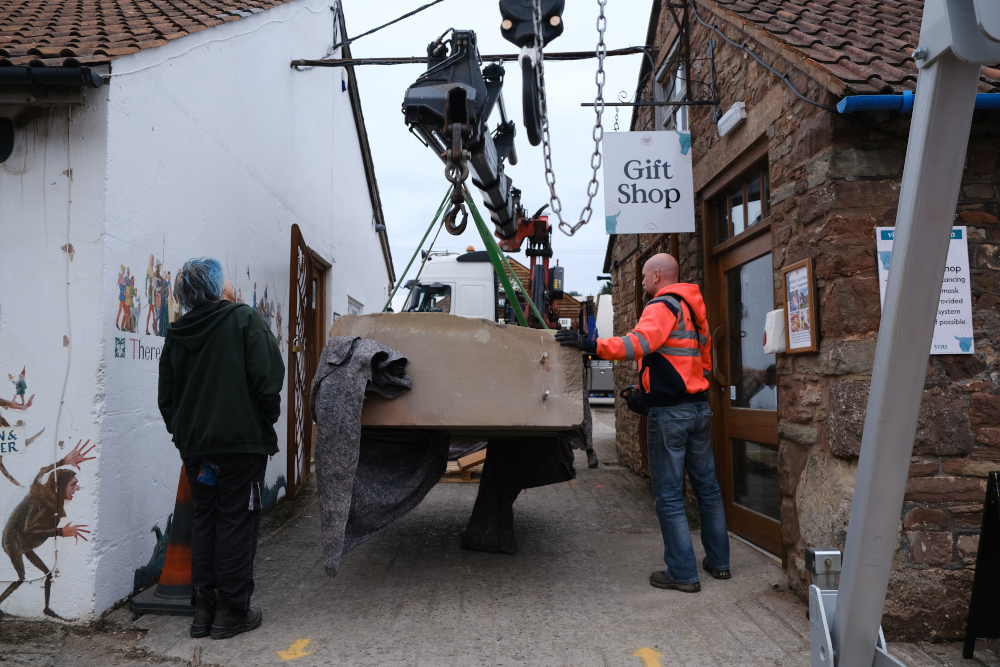
We were always careful to make sure that the lifting equipment stayed away from any delicate area of my carvings.
mind the nose.On to the site.
When we arrived on site, the first thing was to get the stone off the lorry.
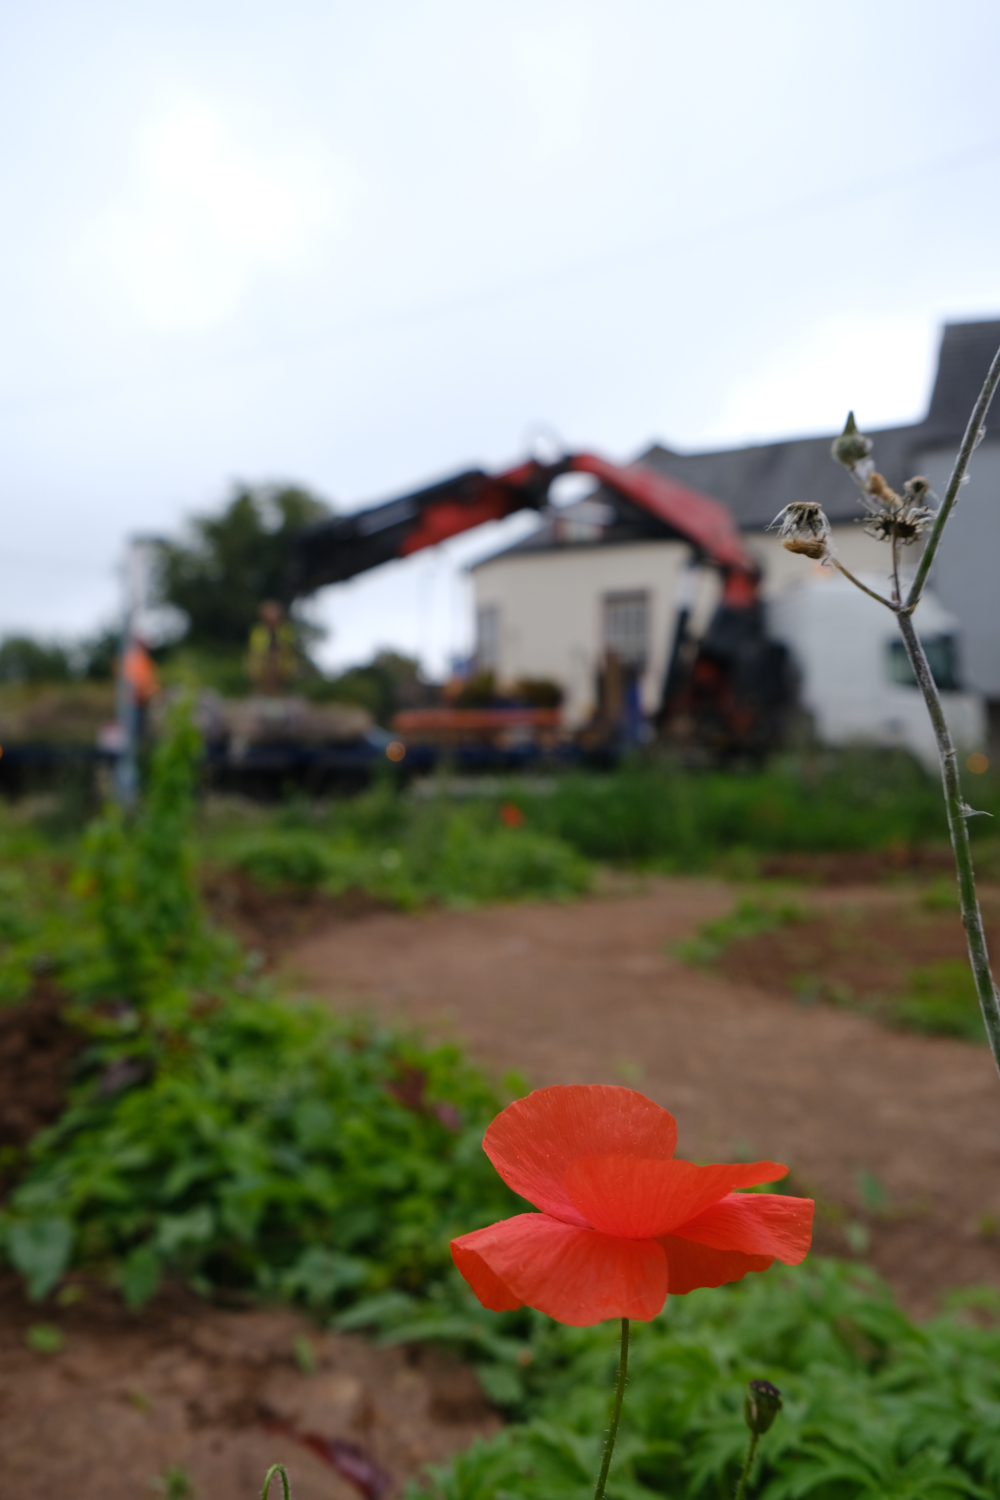
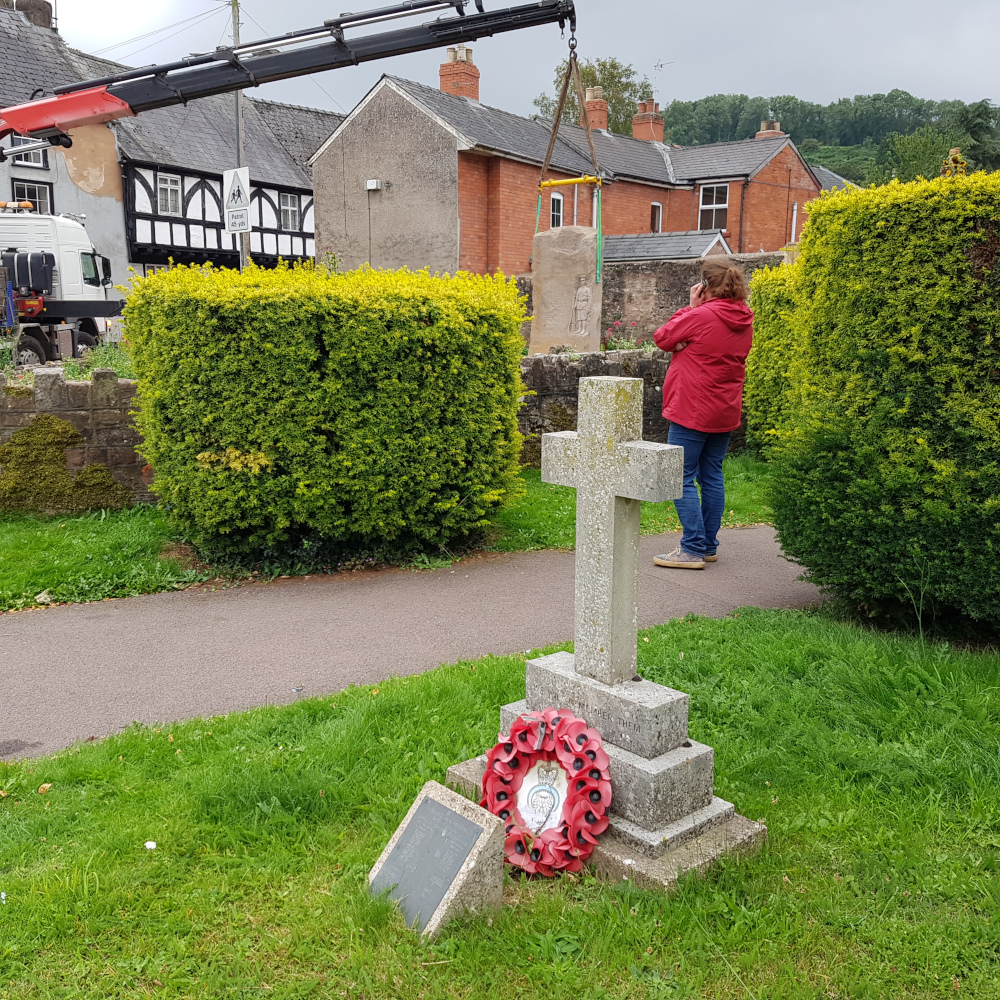
There were two poppy plants that we tried not to disturb when we were installing the monument.
That white house is where George Hyett grew up.
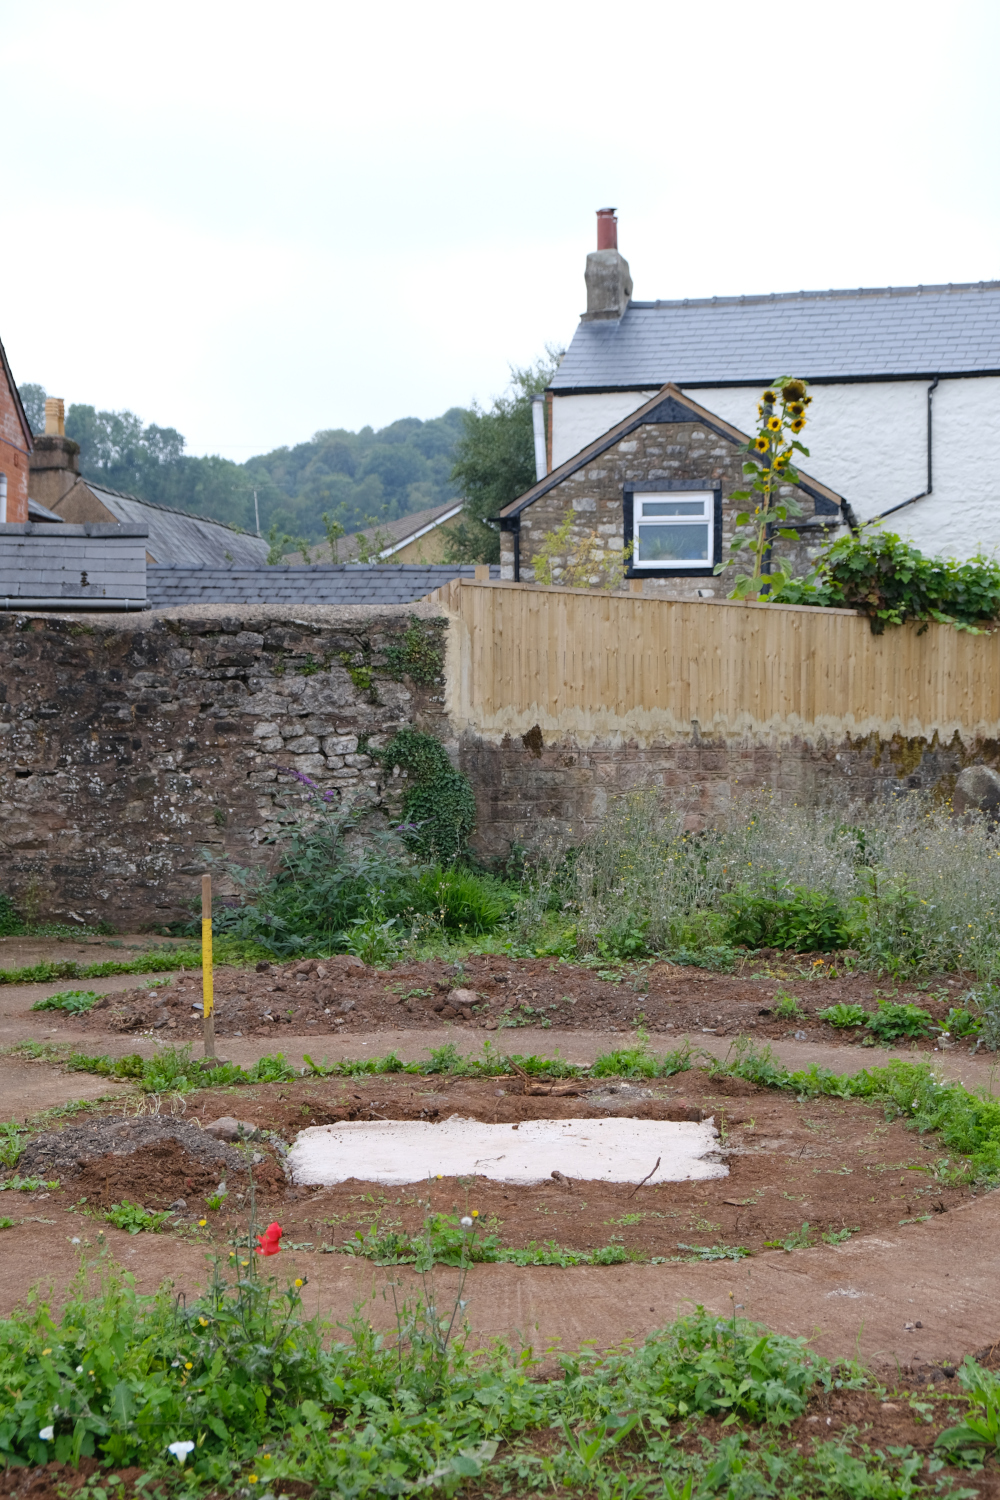
The concrete pad.Carefully lowering the stone.
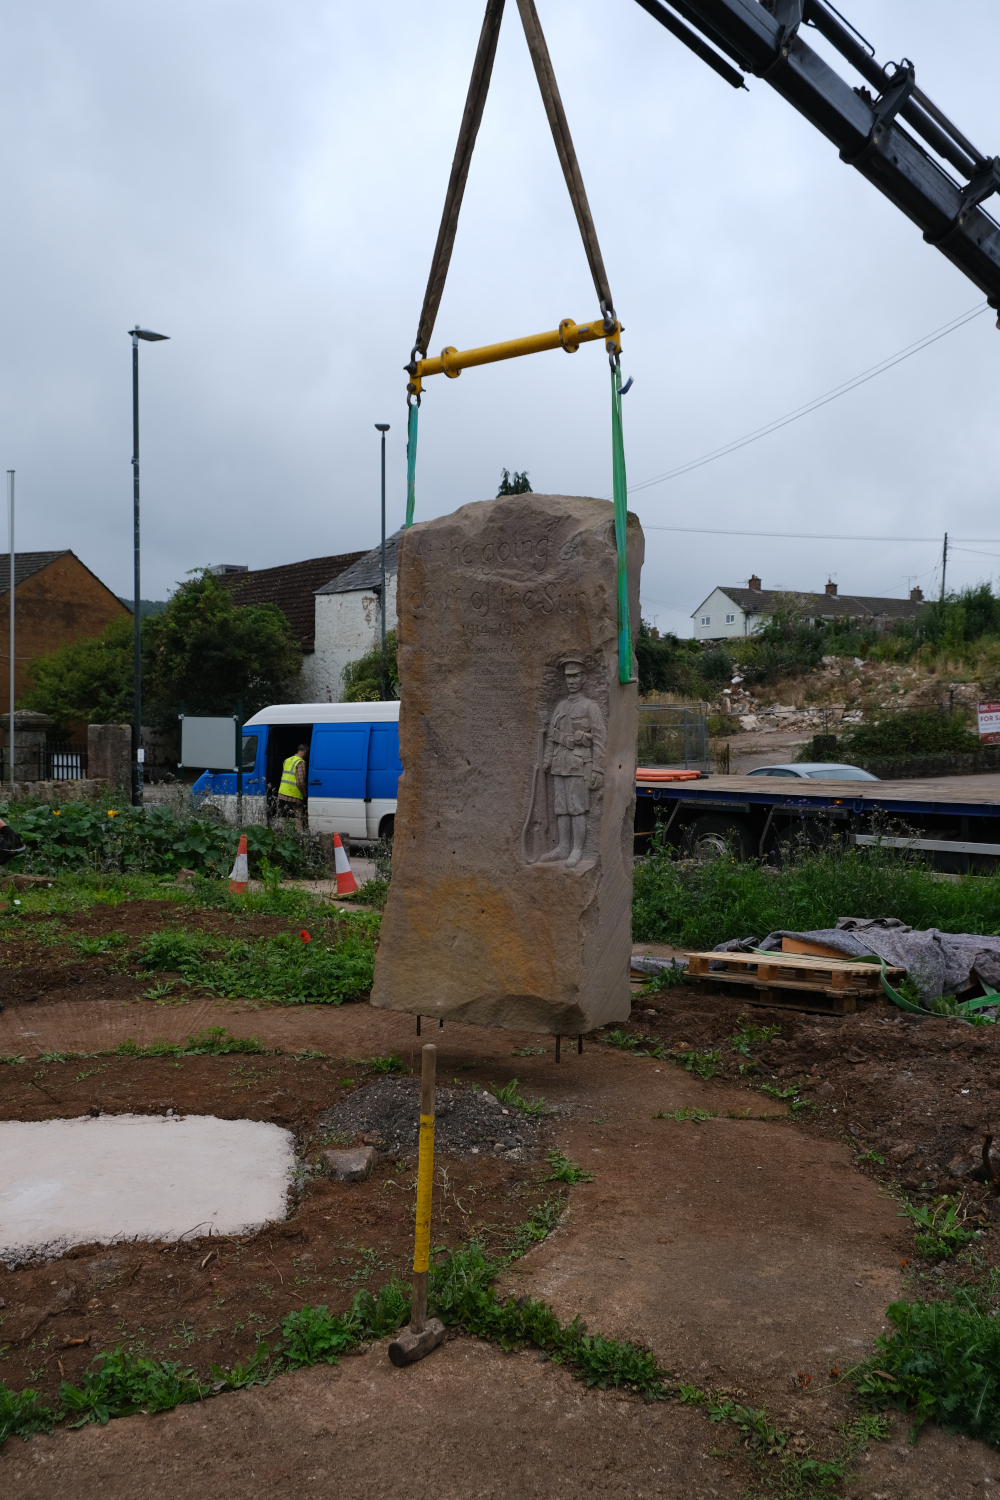
Obviously getting the stone on and off the lorry required a different lifting set up. Once the stone was off the lorry we swapped back to the bar to lift the monument upright and offer it up to the concrete pad.
offering up.
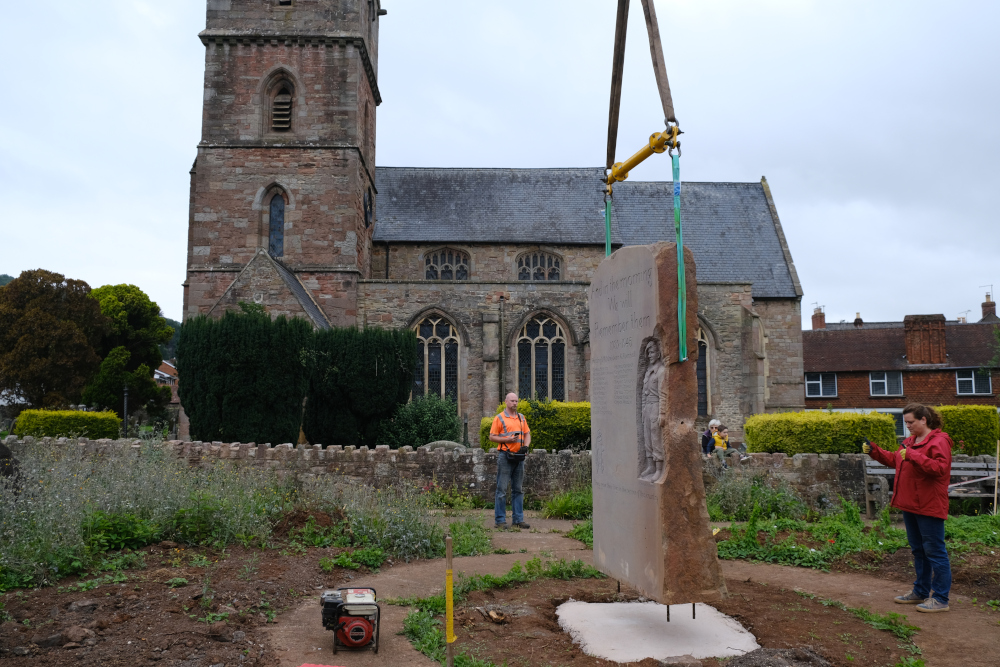
Then I needed to line it up East/West and then where the holes needed to be were marked onto the concrete.
Lining up.
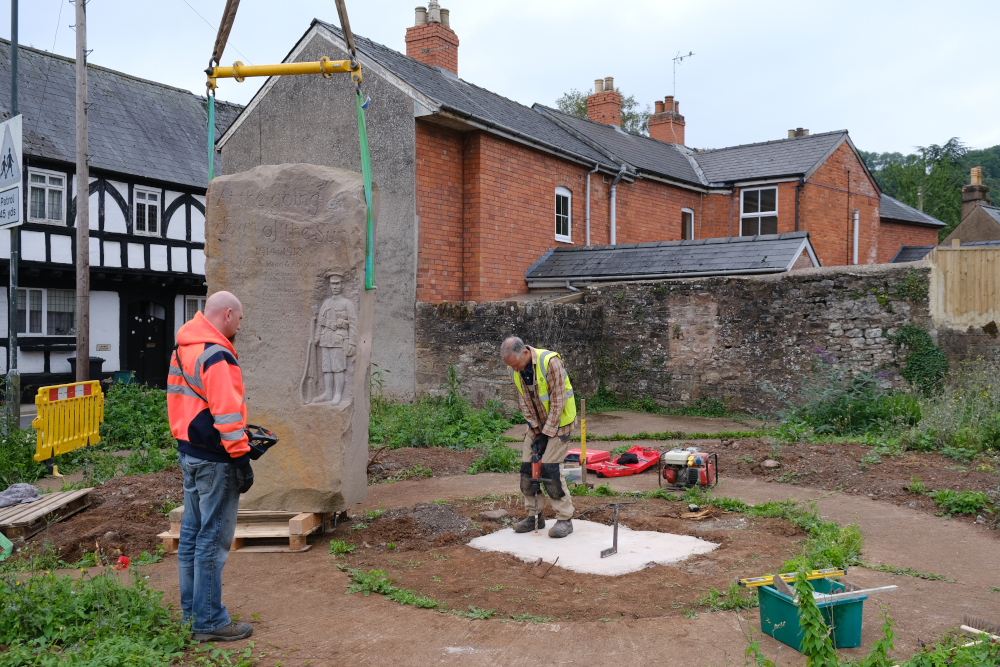
Obviously drilling the holes had to be done square to the base.
Drilling the holes ready to receive the cement and dowels.
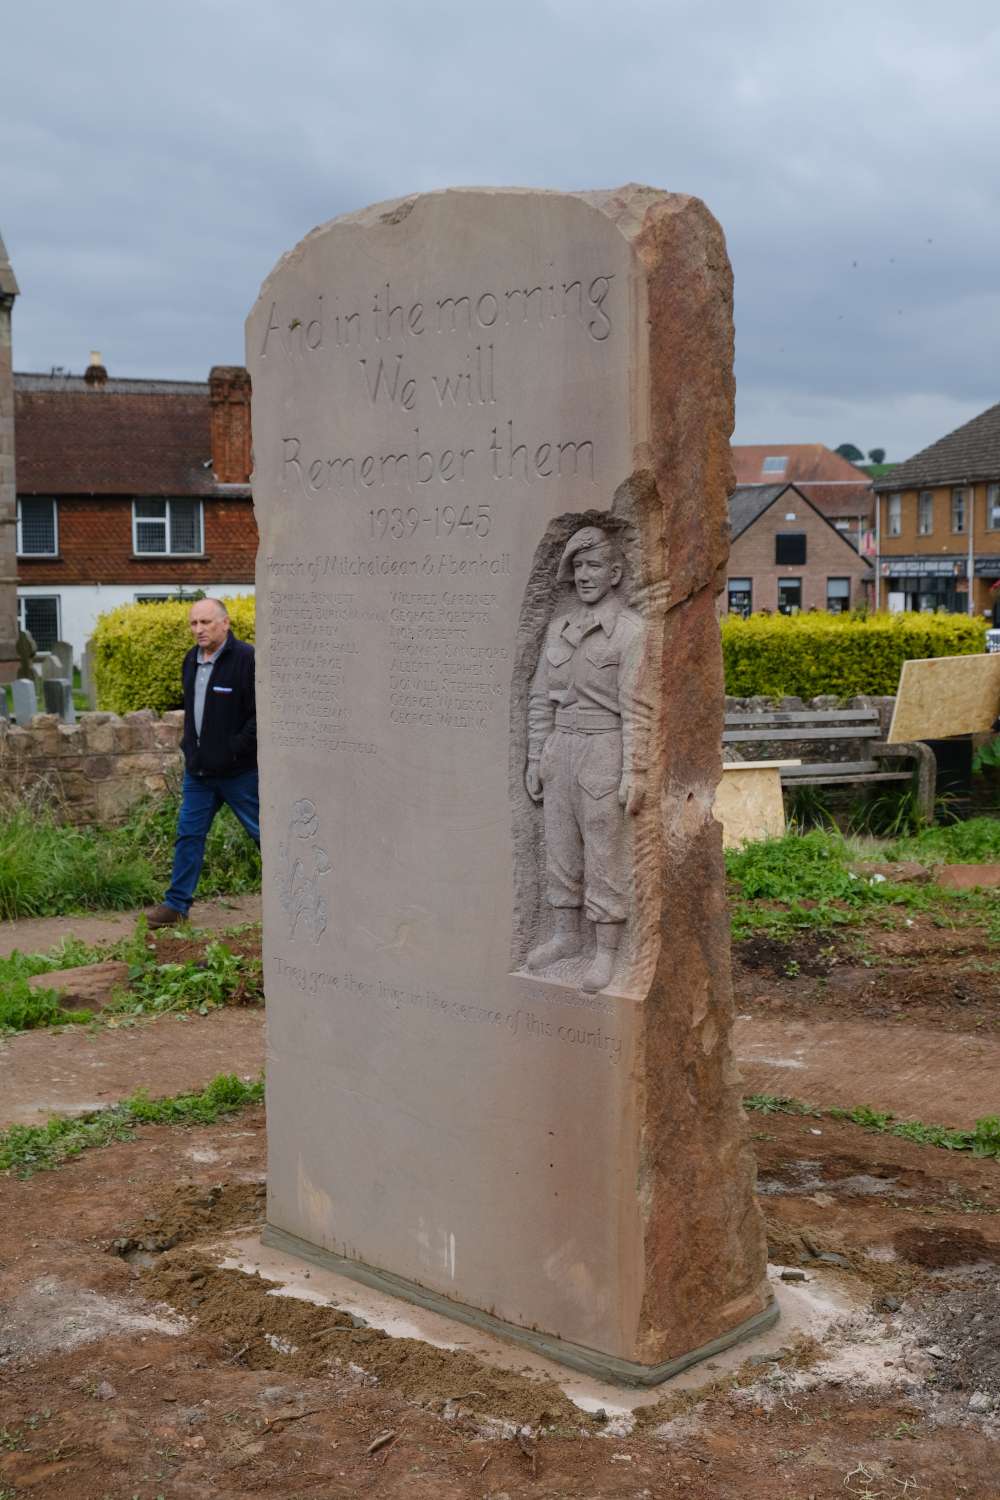
We then lowered the stone and checked for level before the final installation. The stone was levelled against the tower of the Church and then the final fix was done by raising the stone squeezing the glue into the holes and dropping the stone into place.
Lining up with the Church tower.The old and the new.
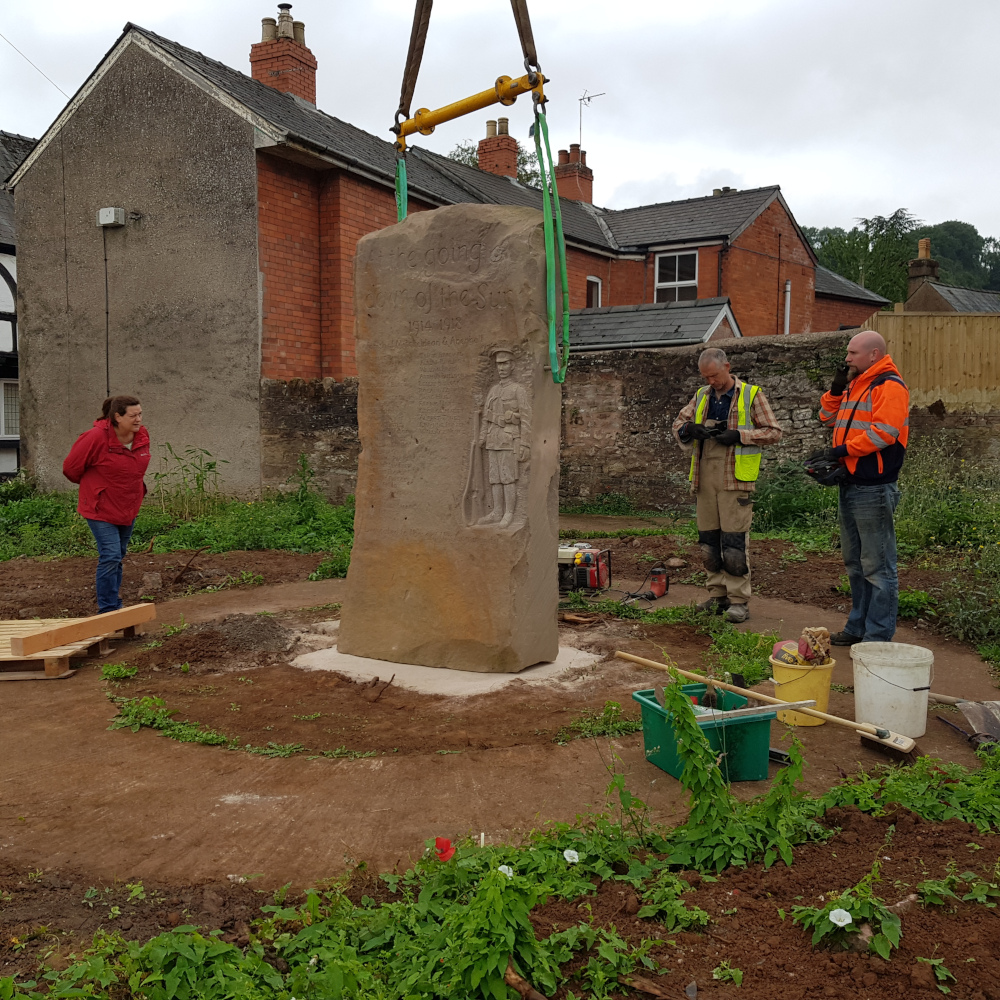
Once the stone was levelled and the dowels were cemented in, the lifting equipment could be removed and I could stand back and see just what I had acheived.
And down.
Finally a sand wall was built and cement was poured under and around the base of the memorial.
mortared in.
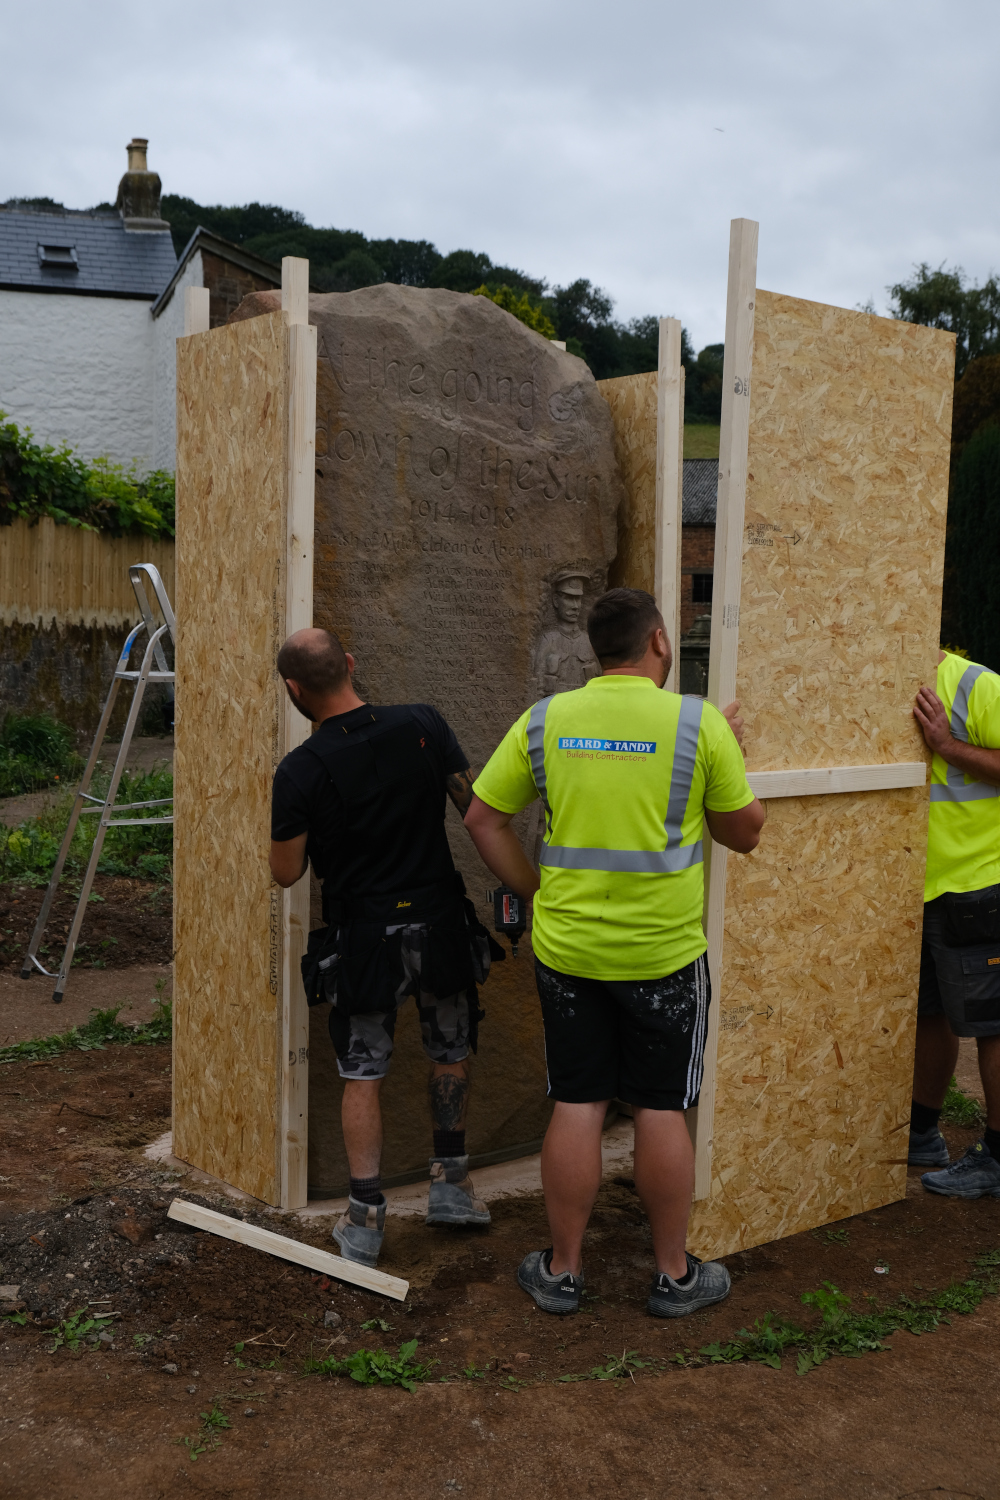
The new war memorial was then boxed up to keep it protected and hidden until the unveiling day. John Tandy who had started the campaign for a new war memorial many years ago arranged for his son who now runs the family business Beard and Tandy to erect a box around the memorial to keep it a surprise until the official unveiling.
Boxed in until the Unveiling.
My lifting expert Damon Bramley and his team were incredible and everything worked beautifully, their care and knowledge helped to take some of the stress out of this emotional project.
Thank you to my Partner Ed Francis for the amazing photographs, documenting this important project, the next post will feature photos from the unveiling.