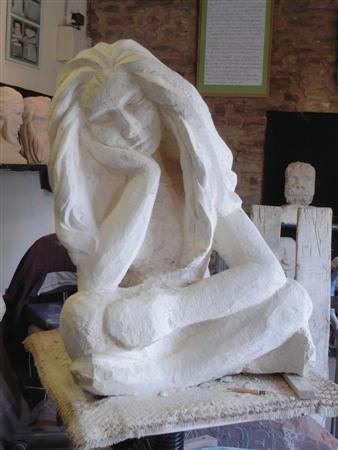
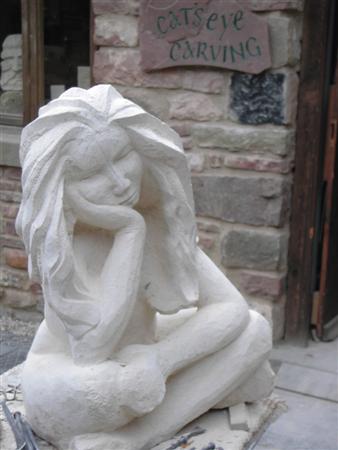
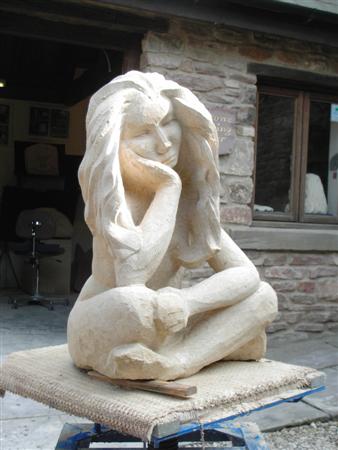
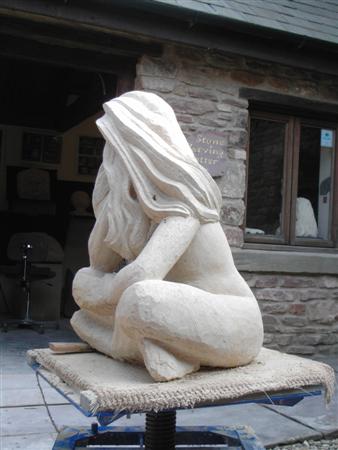
Pins and Needles Stone Sculpture
14 July, 2008 – 5:00 pmThis is Pins and Needles, so called because if she ever stood up that is what she would have!!
When I carve I never concentrate on any one feature, it is important to maintain a flow between each feature. This was the biggest and first full figure that I had carved. So it was a very exciting new challenge. The piece of stone I had for this was from the scrap pile of my favourite quarry, Veizeys quarry near Tetbury in Gloucestershire. It has beautiful carving qualities, its hardness enables me to create strong lines and good detail. It is very dense and consistent in it’s bed. The bed is how the stone is laid down and formed.
The piece was not a full rectangle it had a slight slope at the back and was missing a corner at the top on the right. This encouraged me to create the shape as it is. I made a small clay maquette (model) to identify the proportions. It was not something for me to copy but a visual aid. It was only about 5 inches high and sadly I knocked it off my stand and it shattered, it was only made of clay.
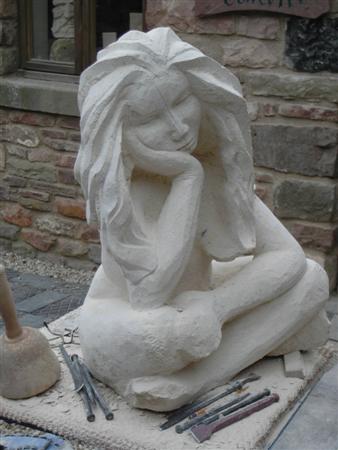
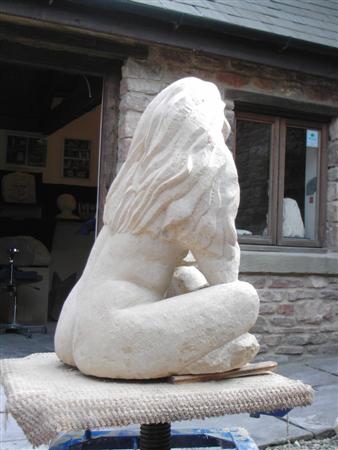
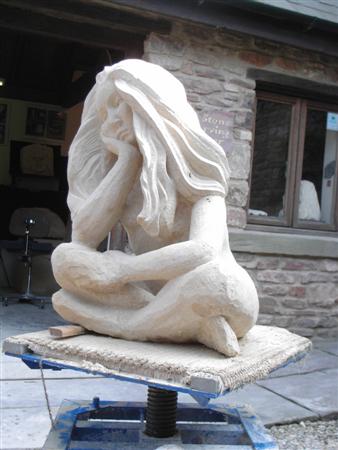
The first thing that I do is to roughly sketch on the face of the stone the design that I would be carving. Then set to work. First of all I start with a half inch chisel and carve around the pencil lines. Once I have these safety cuts in place I go in with the big chisels. The punch which is like a big nail, this is for roughing out. The pitch, which has a slight angle on the end-the edge is placed against the stone at a bit more than 90 degrees and struck hard with a hammer, this removes large amounts of material, but can only be efficient when used on a flat surface.
I remove more stone with my punch and roughly identify key elements of the carving, until the time when I can start using my claw, this is used to remove material in a more controlled way and using this I can start to identify more features.


As I was working 2 faults emerged from the stone, before I start I check the material for defects. One method is to tap the stone with a chisel , if it rings then the stone is good otherwise there may be a dull or rasping sound. The same way a professional may check a bell or a piece of porcelain. However when I checked the stone I missed this. I continued working to see if these faults would work out, one being down the front and one down the back, obviously this was my main priority it would be pointless continuing if the stone was dead. These defects did work out and actually helped my progress as all the while I was concentrating on this problem I was removing large amounts of stone fearlessly.
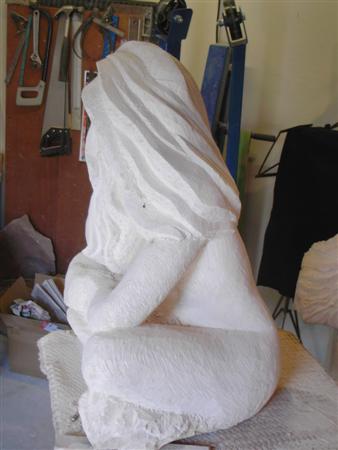
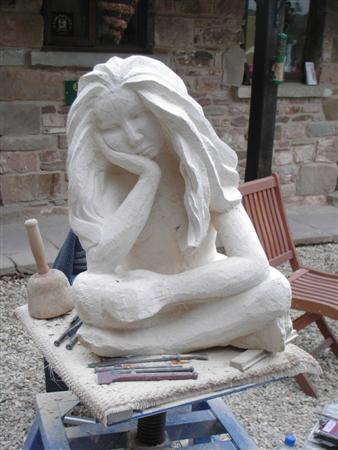
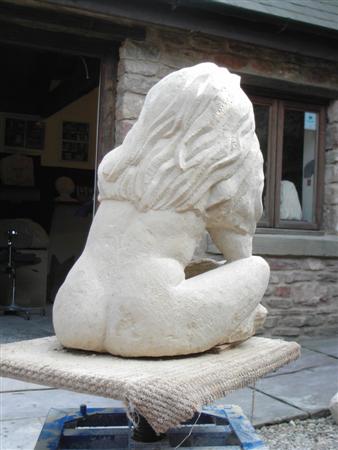
The next decision I had to make was putting the hollow through the arms to join the front to the back. If I left it I would have a front and a back, which may not join up, but the carving would be safe until it was time. I had to carve through the underneath of her arms in order to maintain the flow of the carving.
It was important to ensure that I left enough stone to carve in the important final features.
As the details became more developed the tools that I used became more delicate, features became more refined, the hollows were finding their way through as I became more confident. I had put hollows and windows through some of my other carvings but I had invested so much time in this carving I got a little burst of excitement with each one.
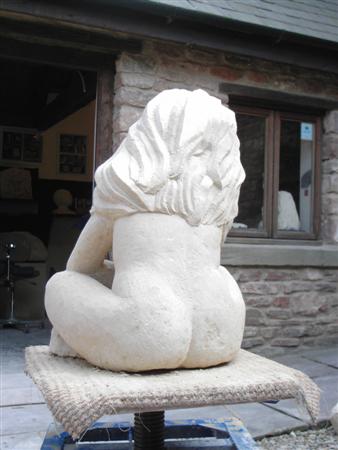

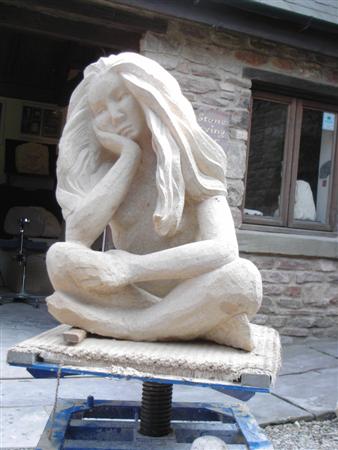

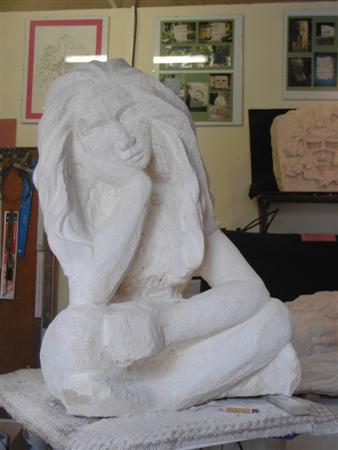
As I started putting the finer details in I turned my attention to the hand on her knee, unfortunately the fault that ran through the front reared its ugly head!! As I was carving her fingers the first three sheared off, I couldn’t say too much because I was surrounded by onlookers it was a lovely sunny day and I was working outside!!
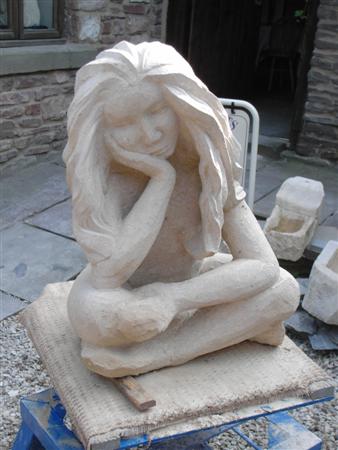
I finished the carving which was only a week, sawed through her wrist and chopped out the dead stone. I pushed clay into the cavity and built a new hand. From this I carved a new hand in a colour matched piece of Tetbury Limestone. Each time offering it up to see how much more there was to come off to make it fit. Once I had it fitting snugly I drilled two holes in the new hand and two corresponding holes in the thigh. I glued one stainless steel dowel in the hand and then grouted them both in the thigh and filled the surrounding cavity with this grout. A liquid mix of lime and stone dust. I allowed this to dry for a week before trimming the new hand to fit the wrist and the knee. This is an invisible repair and is as strong as the stone itself, and is a testament to my training as a stonemason!!

")
")

In some Roman and other historic sculptures this is how they fixed arms, hands and heads. Obviously not using stainless steel dowel!!
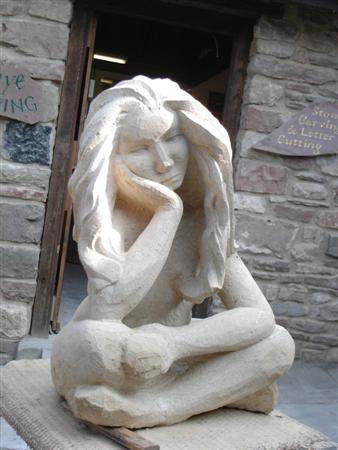
So some of you may have been looking at Pins and Needles on my gallery but here is her story.

1 Trackback(s)